Installing the DP-201 Digital Pen Drivers
The Digital Pen drivers are required to connect your digital pen docking station to your computer. When installed the computer will send the written data stored in the pen to the appropriate IYOPRO workflow instance.
Download the driver PenDownloadDriver-DP201-v2.7.5-32_64Bit.zip and extract the content of the archive into a new folder. Then run Setup.exe and follow the instructions. There are no special settings needed so you may step through the dialogs with next until the installation process has finished.
Installation of SendAll
If you wish to send all data on the pen in one single transaction you may doubleclick on PR_SRS_SendALL_1.reg. If you omit this, you always have to wipe over the USB-Symbol on your Pen card
Installing the Batch Printer
The Batch Printer is required to print forms on your printer.
First download and install Kayentis_Printing_Solution_1.3.4 (SRS DYNAMICFORMS).exe. This will also install Ghostscript on your computer which is required to print dynamic forms.
Then download and install BatchPrinterService-V1.8.4.zip.
|
If you are asked where to install the Batch Printer Service we recommend to choose a directory without spaces in the filename to avoid further problems. There are several extensions available which require to reconfigure Batch Printer Service if there are spaces in the installation path. We always install to c:\BatchPrinterService |
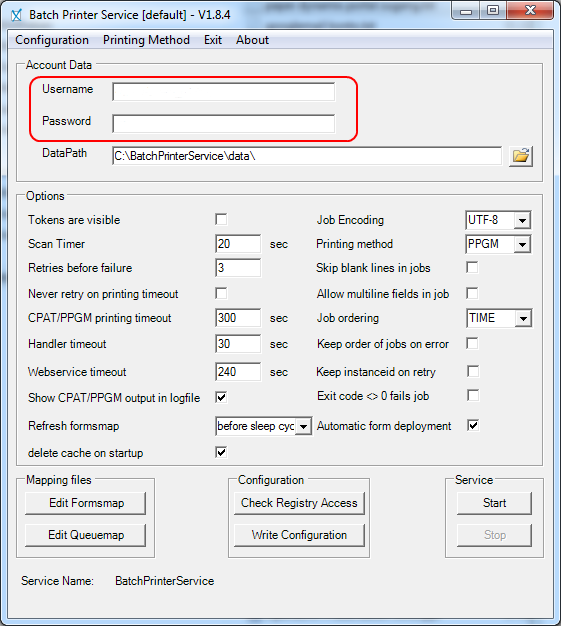
After installation you need to configure the service. Use Start->Programs->SRS->Batch Printer Service->Batch Printer Service Config to start the configuration editor.
You need to input your Account data which has been deployed to you with your pen. Also adjust all settings as shown in the screenshot below.
In a Demo Environment choose Configuration->Service Endpoint and change the Endpoint to custom. Then enter
https://demo.paperdynamix.de
To configure the PPGM settings choose Configuration->PPGM Settings... Adjust the Path to PPGM.exe. This is usually
C:\Program Files (x86)\Kayentis\PPGM\Command Line\ppgm_cl.exe
and click ok to apply these settings
Now you should be able to create your forms map without errors. To create the formsmap choose Configuration->Create Forms Mapping. To verify if the forms mapping has been created successfully click on "Edit Formsmap". You should see a list of deployed forms.
After that you need to create the Queue mapping to allow IYOPRO to print on your printers. Therefore click on Configuration->Create Queue Mapping. Again you may verify the results by clicking on "Edit Queuemap".
Next you need to configure the account, under which the service will operate. This must be an administrative account of your computer. Click on Start and type services.msc and press enter. In the appearing service dialog locate "SRS BatchPrinterService"
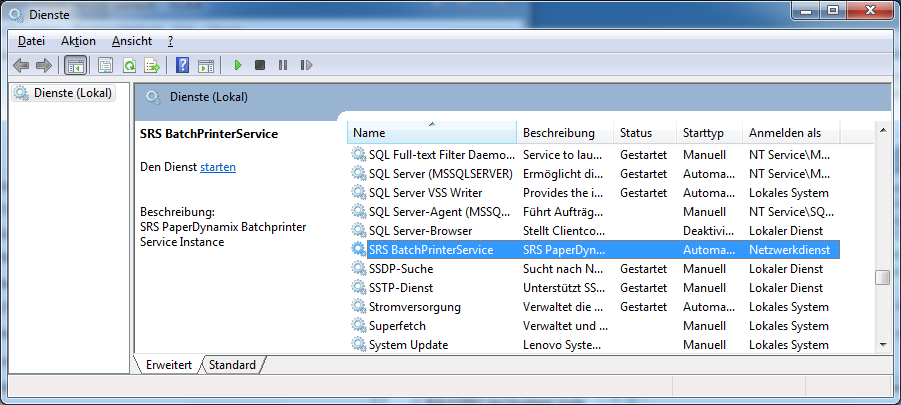
Right click on the service and choose Properties. On the LogOn Tab type in the credentials of an administrative account on your computer. Confirm the changes.
You may now be able to start the Service. To start the service go to the Batch Printer Configuration Dialog and hit the Start button.
QR-Code support
To install the QR-Code support download the qrcode-tools.zip and extract the content into the tools subdirectory of your Batch Printer Service. If you have installed the service at c:\BatchPrinterService the content of the archive must be installed at c:\BatchPrinterService\tools. You may need to create this directory if it does'nt exist.
Download qrcode-activate.zip and extract the content to a temporary directory. Copy the file onBeforeAltFormFetch.cmd to the EventHandler subdirectory of your Batch printer Service.
Copy the file modform.pdf to the data subdirectory of your Batch printer Service.
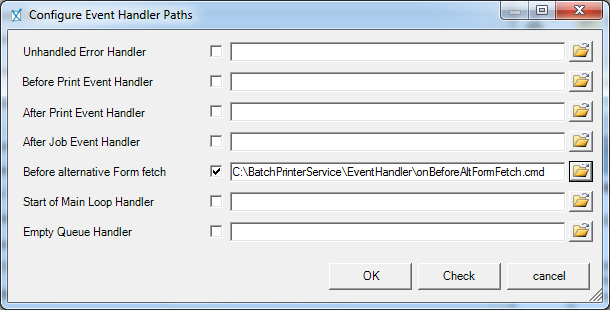
Open the Batch Printer Service Configuration and choose Configuration->EventHandler Settings... Assign the "Before alternative Form fetch" event handler as shown below
Installing the Forms Data Poller
This is only required in special test scenarios and not recommended for productive use
Download and extract FormsDataPollerService-1_7_0-Release-x64.zip . Run Setup.exe and follow the instructions
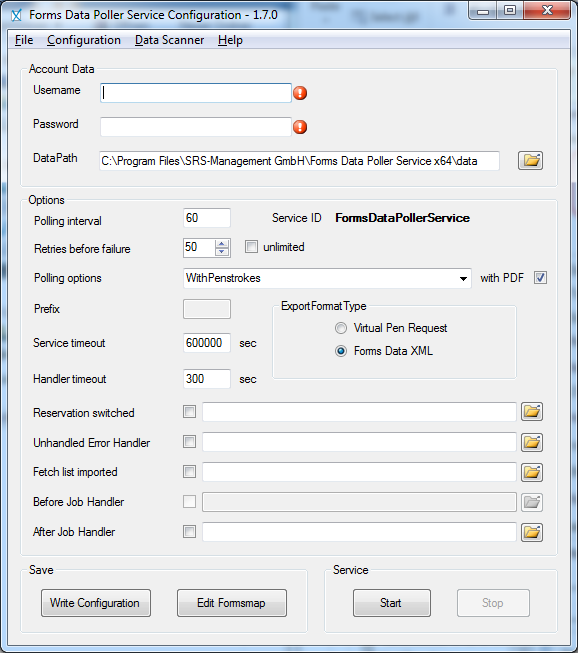
After installation you need to configure the service. Use Start->Programs->SRS->Forms Data Poller->FormsDataPoller Config to start the configuration editor.
You need to input your Account data which has been deployed to you with your pen. Also adjust all settings as shown in the screenshot below.
In a Demo Environment choose Configuration->Service Endpoint and change the Endpoint to custom. Then enter
https://demo.paperdynamix.de
Now you should be able to create your forms map without errors. To create the formsmap choose Configuration->Create Forms Mapping. To verify if the forms mapping has been created successfully click on "Edit Formsmap". You should see a list of deployed forms.
To notify IYOPRO on the event of a new job add an "After Job Handler". This command script will be provides to you on request.
Next you need to configure the account, under which the service will operate. This must be an administrative account of your computer. Click on Start and type services.msc and press enter. In the appearing service dialog locate "SRS Forms Data Poller Service"
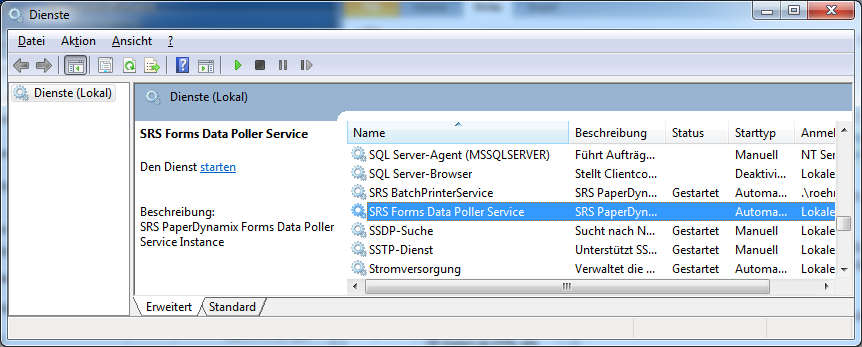
Right click on the service and choose Properties. On the LogOn Tab type in the credentials of an administrative account on your computer. Confirm the changes.
You may now be able to start the Service. To start the service go to the Batch Printer Configuration Dialog and hit the Start button.