Custom shapes allow an individual presentation of elements which are provided by BPMN 2.0. This feature only applies to the appearance of shapes and will not affect the elements behavior in process automations and process simulations.
Manage a new custom shape
Create a custom shape
A custom shape is created in the shape settings of the customer settings. Use the category selector to open the settings of the desired shape. Press the "Add" button afterwards to open the custom shape editor.
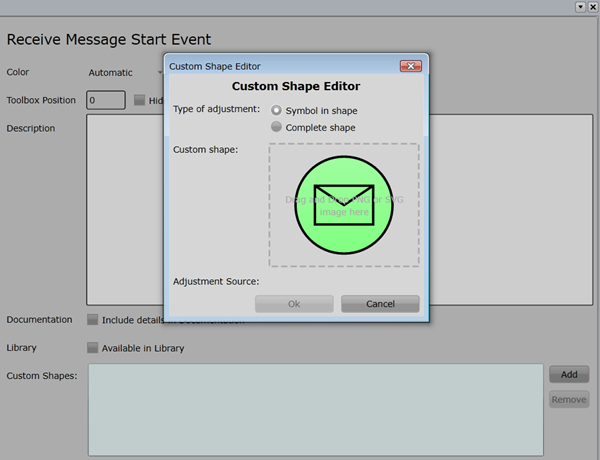
The following settings may be adjusted:
Type of adjustment |
Decide whether the whole shape will be replaced by the new imported image or only the symbol in the shape. |
Custom shape |
Drag and Drop the image of the custom shape into the preview dialog. Only SVG and PNG can be used. A preview of the custom shape is shown. |
Adjustment source |
The name of the imported file is displayed here. |
The formats SVG and PNG can be used to import images as custom shapes. SVG's are highly recommended since this data format is scalable and won't cause any quality losses when resizing the element later on.
Edit an existing custom shape
Custom shapes are edited in the customer settings. Use the category selector to open the settings of the desired shape. Double click the icon of the custom shape to open the custom shape editor. The custom shape can now be adjusted as it is described in the paragraph above.
Remove a custom shape
Custom shapes are removed in the customer settings. Use the category selector to open the settings of the desired shape. Selected the custom shape and press the "Remove" button afterwards to open the custom shape editor. When a custom shape is removed every applied element in diagrams will be set back to standard.
Use a custom shape
During modeling only those custom shapes can be used which are created for the currently activated customer settings. Nevertheless users are able to see any custom shape that are already used in a diagram. They just won't be able to create a new element with such custom appearance.
Apply a custom shape
To use a custom shape the corresponding BPMN 2.0 element must be dragged into the diagram first. Afterwards its appearance can be customized in the advanced properties. Open the tab "Custom Shapes" and select the desired custom shape for the modeled element. The appearance is changed immediately.
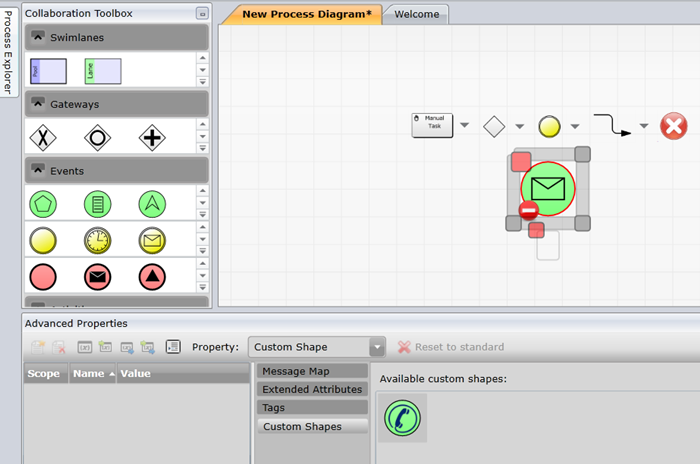
Reset a custom shape
The appearance of a customized element can be set back to standard in the advanced properties. Make sure the element is selected. Press the button "Reset to standard" in the "Custom Shapes" tab of the advanced properties. The appearance is changed immediately.